Finish
Like A Pro…
For a general refinish, follow the instructions in this video:
Note – I have developed a new oil based product called Q-Gel, which replaces my original Liquid Gold Cue Oil shown in the video. You can still use either but Q-Gel is easier and is also a very effective cleaner, so it is perfect for general maintenance.
If your cue needs more than just a general refinish, follow this process:
Step 1 – Remove the old finish and prepare the wood
- Give your cue a good rub down with a paper towel using a suitable solvent. Common white spirit is fine.
- Take some 320 grit sandpaper (use good quality stuff like cloth backed aluminium oxide) and sand the whole cue, taking care to move evenly over the surface. You may need to start with 240 or lower if you are trying to remove dents/scratches, and you will probably need to change paper a few times as you are likely to see a build up of grime etc.. Clogged sandpaper will make a mess, work with clean sections.
- When you start seeing nice clear wood dust, change the sandpaper grade to 400 grit and and do exactly the same. Then repeat with 600 grit paper. You can go higher if you like, but you do not need to.
Hint – If you want to highlight the grain of an Ash shaft, save some of the Ebony or other dark hardwood dust that you created whilst sanding the butt section. You can use it during the oiling stage. - At this stage the wood should be smooth and free from any visible scratches if you have done it correctly. If you see scratches, you have not been thorough enough or worked evenly. Start again, and do it carefully.
- The cue should feel very smooth right now.
Note #1 – Only use vertical strokes. Watch the video on Scratches page for a clearer idea of sanding technique.
Note #2 – If you have a lacquered cue, you will need to remove all the lacquer using a rougher grade sandpaper. Start with 120 grit, or maybe 80 grit, and remove all the laquer first. This will be hard work but you must remove it all. Look under the light for any shiny patches and make sure they are all gone. Once you can only see wood dust and no shiny patches, move on to 180 grit, then 240, then 320 as above.
Step 2 – Apply an oil finish
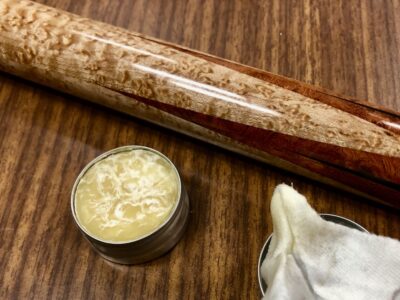
These instructions are for my Liquid Gold Q-Oil, but you can use Q-Gel if you prefer.
- Wear gloves, or at least avoid skin contact. It will get sticky so it’s best to keep it off your skin or clean it off immediately with suitable solvent based spirit or specialist cleaners. Do not use water!
- Clean the cue first, use a damp cloth and buff dry, or if very dirty use site spirit on paper towel and wipe the cue up and down a few times. This will remove any surface grime/grease.
- Apply liberally over the whole cue, shaft and butt, rubbing well into the grain
- Use plenty of oil and make sure the wood is saturated all over
- Leave for one hour to soak into the cue then wipe off all the excess oil with a soft cloth or paper towel
- IMPORTANT – Do not leave any excess oil on the cue or it may be very difficult to remove later
- If you saved some dark wood dust from sanding earlier, you can use it now to highlight the Ash grain, rub it well in until it looks well covered. Use a paper towel to wipe the surface so it is relatively dust free.
- Leave to dry for 24hr
- Buff with a clean soft cloth. If the cue feels slightly ‘gritty’, rub it with ultra fine 0000 grade steel wool to remove any bits of dust stuck to the surface
- Repeat the oiling process. 2-3 oil treatments will probably be enough, but do it until dry spots stop appearing after the oil has sat on the cue for an hour. At this point the wood has probably taken all it needs, but feel free to apply further coats, it will not hurt.
- If you would like to enhance the grain of an Ash shaft more and/or darken Ebony or other dark wood, I recommend you apply Q-Age which will give a more aged look to the cue and seal it even more.
- You can finish with a final coat of Q-Gel which will ‘clean’ any Q-Age left on the surface further help seal and protect the wood.
- Continue buffing regularly during play to keep it clean and maximise the shine
Initially, the cue may not be as shiny as you want, but after a few weeks of regular buffing with a cue towel or other soft cloth, the oil finish will mature, harden, and develop a deep and natural shine.
Step 3 – Secret extra finishing stage
Although not essential, I strongly recommend the following ‘secret’ step:
- After leaving the cue to dry overnight, give it a good rub down with the ultra fine 0000 grade steel wool.
- This will really make the cue feel super smooth in your hands and help develop the shine quicker.
- You can re-oil straight after this if you feel the cue needs it.
Initially, the cue may not be as shiny as you want, but after a few weeks of regular buffing with a cue towel or other soft cloth, the oil finish will mature, harden, and develop a deep and natural shine.
Note
- You cannot harm a cue by over-oiling.
- Repeat as often as you want as the wood will only take what it needs.
- Not all oils are equal. Some will take an eternity to dry, if ever, and will not create the finish you need.
- Avoid Raw Linseed Oil for this reason, it is not a drying oil and is not classed as a finishing oil. You can search the internet for any number of wood finishing experts who will tell you the same. You may well know someone who says it is good, but it’s not. Don’t get me wrong, it won’t hurt to use it, but there are much better options available.
- Boiled Linseed, Danish, Tung and many other finishing oils are fine to use. Each has it’s own characterstics with regards to drying time, water resistance, durability etc.. As long as it’s a drying oil, it will do the job.
Last word
- Use my Liquid Gold Q-Oil or Q-Gel – They are the best products on the market.
- May not be cheapest option, but they contain the finest blend of expensive, traditional ingredients, and will give you the highest quality, smoothest feeling finish.
