
MW Cues feature unique ferrule designs that have been developed to improve both the feel and hit of the cue but at the same time offering far superior strength. Featuring an integral core that sits deep inside the cue, these ferrules are far superior to the usual ring type ferrules found on normal cues.
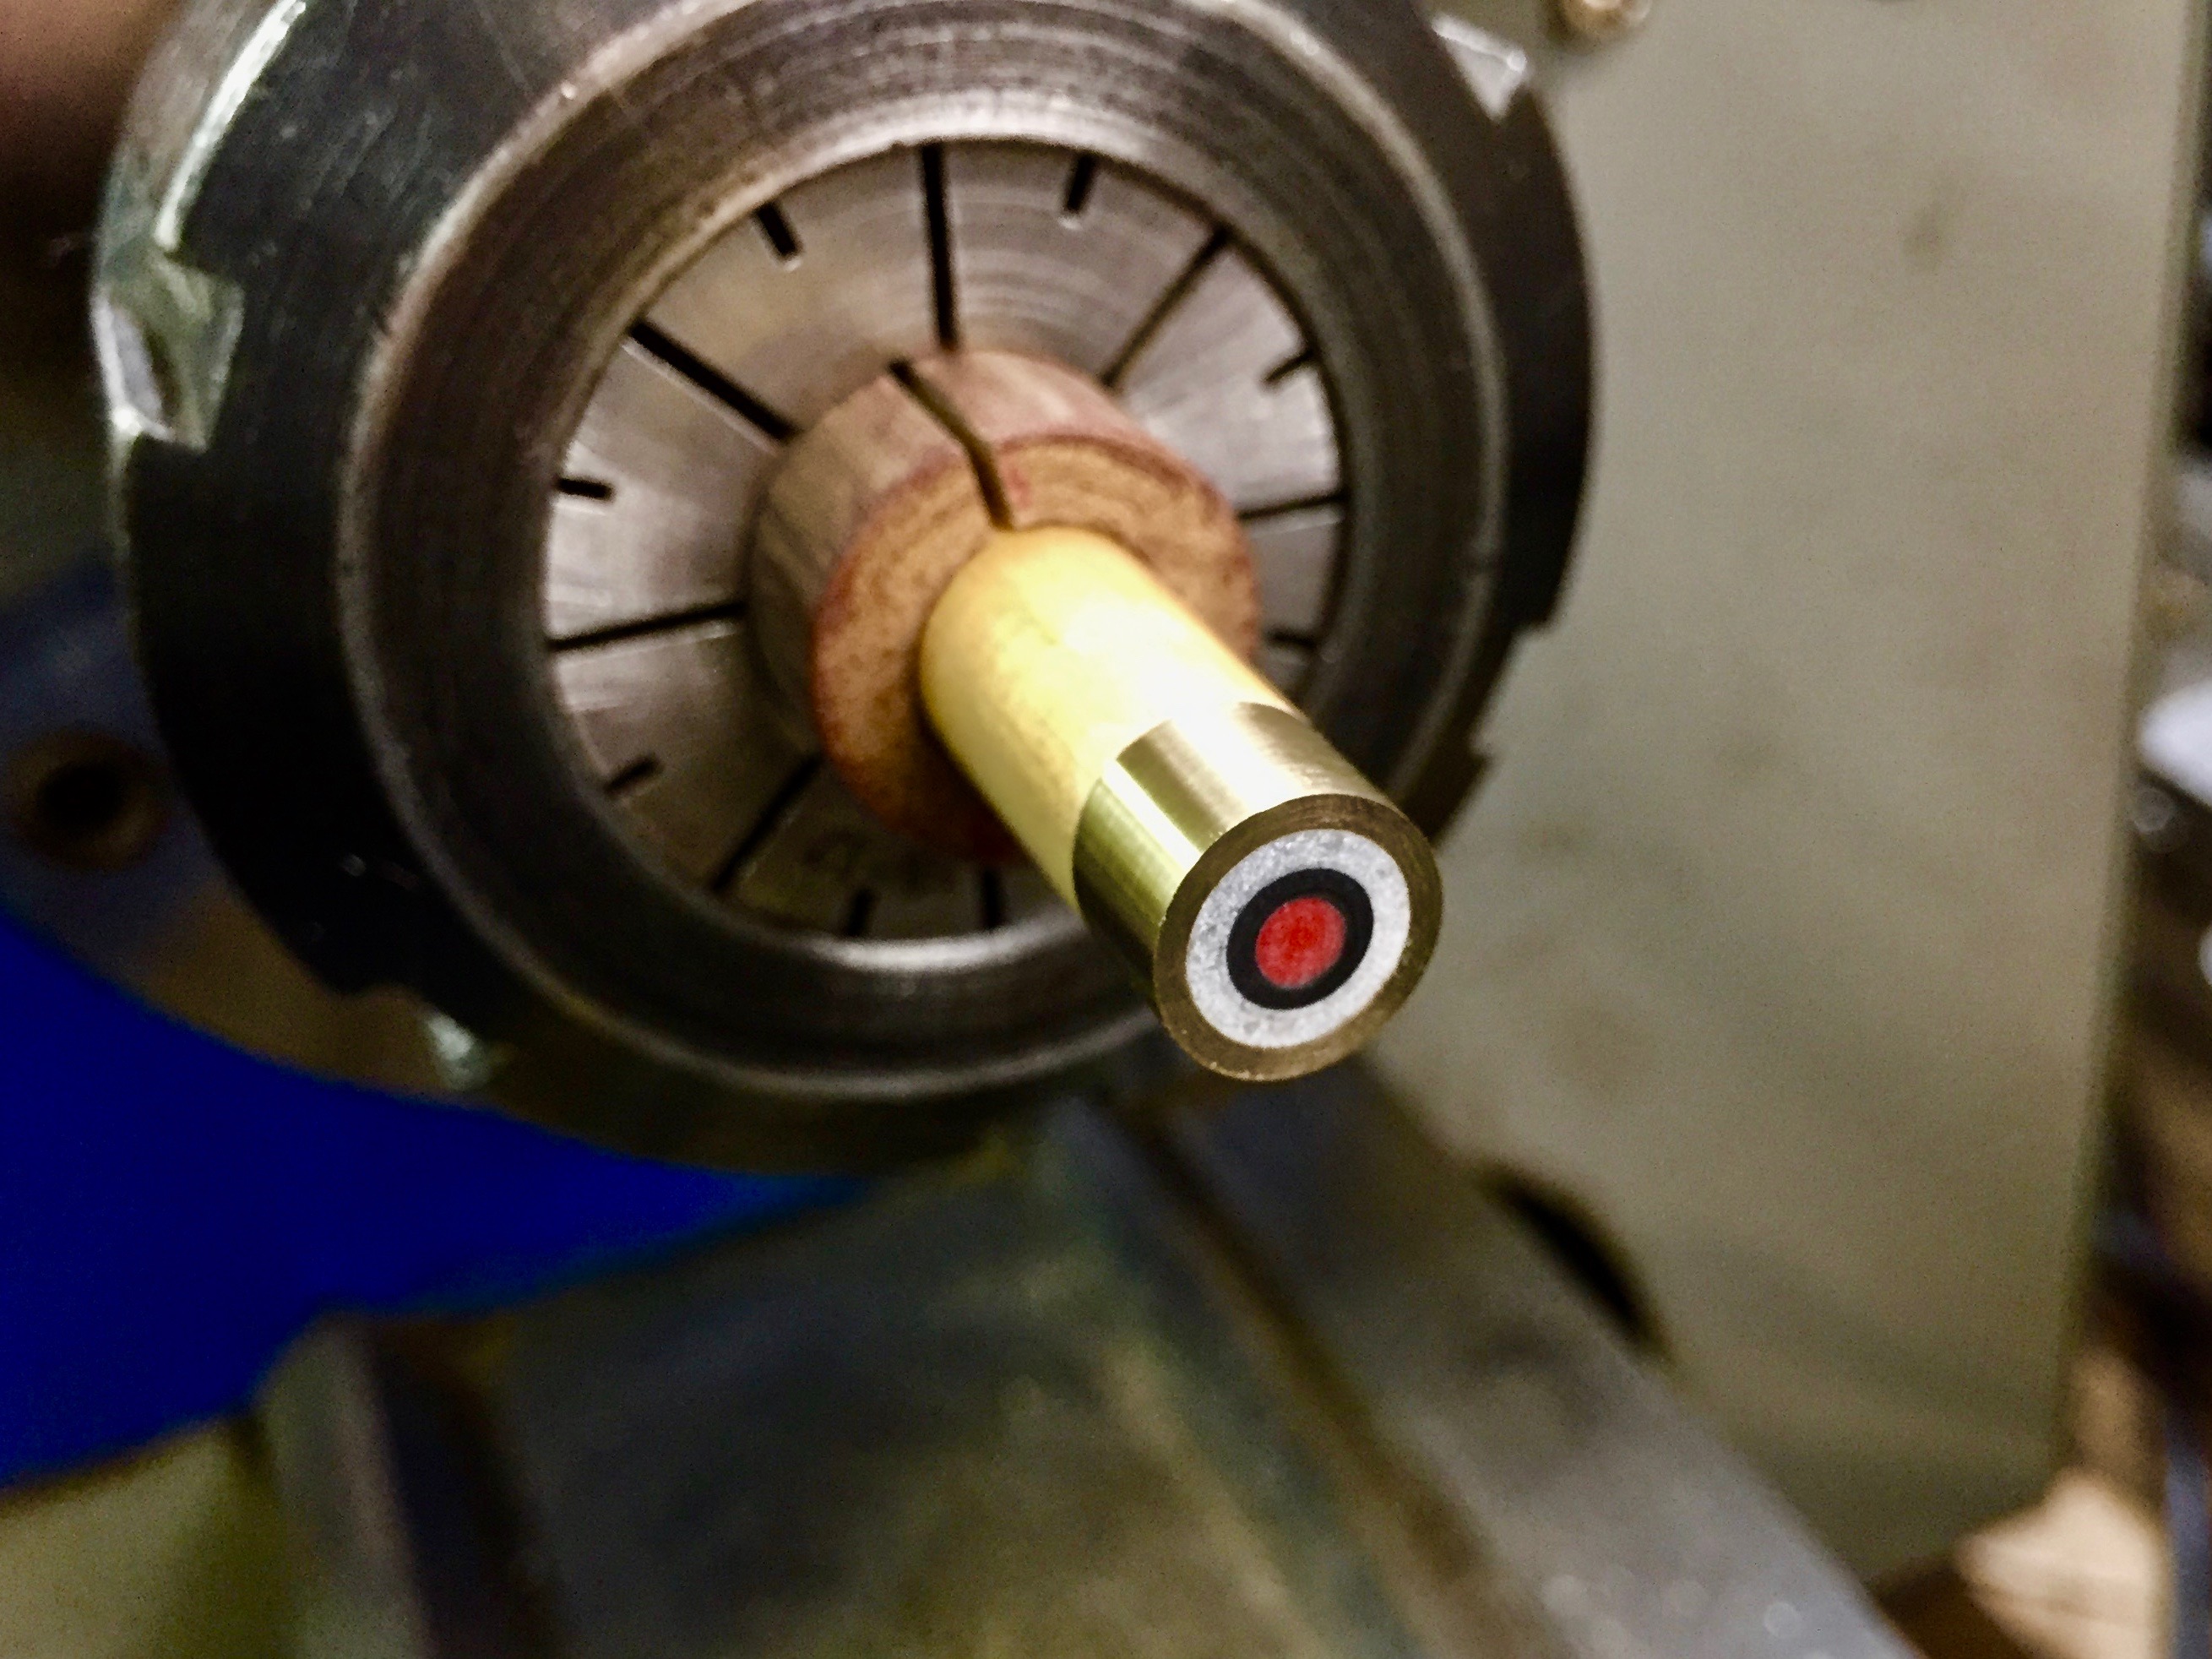
Choose from BlackSpin, the original MW core design ferrule, or the new BullsEye brass ferrule which was developed to satisfy the traditionalists who like the benefits of BlackSpin ferrule and core but simply prefer the look of a brass ferrule.
Both ferrules feature:
- Unique core construction - Strengthens the cue and improves the 'feel'
- Permanently fixed - Will never come loose or break the wood
- Future-proof options - Internal core design allows change from BlackSpin to BullsEye or vice versa
BlackSpin benefits:
- More spin with less effort
- Lower cueball deflection
*NEW* BullsEye benefits
- Maximum power & punch
- Unbreakable - Far superior than a normal brass ferrule
Below is a more detailed explanation of the BlackSpin ferrule and core system but the same principles applies to the new BullsEye brass ferrule.
What is BlackSpin?
The BlackSpin system is a revolutionary re-design of a crucial cue component - the ferrule.
• BlackSpin is NOT just a simple black colour ferrule
• Major design innovations inside the cue
• Unique radial stress balancing
• Strengthens the cue and improves 'feel'
I did not set out to make changes to the traditional method of using a simple brass ferrule, but I recently found myself questioning the thing we have taken for granted for many years. The result is a superior method that strengthens the top of the cue and improves cueball reaction.
Why?
There are major design innovations inside the cue itself which improve strength, and balance the radial stresses in the wood, giving a more consistent contact whichever way the cue is orientated.
Many players will have suffered from a broken ferrule where the wooden shoulder has broken away. In fact, often this may happen several times in a cue's life and it ends up much shorter than it was originally.
The base of the wooden shoulder is a weak point which suffers from constant impact stress. Sometimes ferrules break simply because the wood is naturally a bit 'weak', but if the brass ferrule becomes 'unstuck' from the wooden shoulder, then the effect of the impact is amplified as it 'bounces' against the wood and can gradually weaken it to such a point that it simply breaks. Not any more...
The BlackSpin ferrule system virtually eliminates ALL weak spots and delivers a powerful, clean, crisp contact, which helps generate maximum sidespin, topspin and backspin.
Put simply - The cue is stronger but, more importantly, 'feels' better.

How?
There are two crucial components that make up this system.
The core of the tip end of the cue is replaced with the BlackSpin core. A structurally superior component that stabilises and strengthens the radial weaknesses in the wood structure but, most important of all, it helps deliver the right 'feel' on cueball contact.
The unique BlackSpin ferrule design not only sits over the core, it also sits INSIDE the wood. This spreads the effect of impact over a massively bigger surface area and also minimises wood shrinkage problems. The benefit of this is that all the stress is removed from the traditional weak spots and results in a virtually unbreakable cue at the tip end.
Furthermore, the ferrule material itself, whilst very tough and long lasting, has a very similiar density to the shaft wood. This improves cueball reaction over the use of a traditional brass ferrule. A relatively minor point, but nevertheless, one which improves the overall effect further still.
The final benefit of the BlackSpin ferrule is that it looks great on the cue, and makes the point of cueball contact stand out very clearly.

When?
Now - Fitted as standard on all new Mike Wooldridge Cues.
Also available as a retro-fit for any old or new cue, so nobody need miss out on this revolutionary system.
"Once you go black, you'll never go back..."
What Tip?

You can fit any tip to a BlackSpin ferrule but you MUST use a tip pad for these reasons:
1) During use, a tip compresses and tends to spread out over time. With a brass or other metal ferrule this does not matter as the tip 'creeps' outwards from the ferrule. But because tips stick extremely well to BlackSpin ferrule material, this may strain the composite fibres of the ferrule top.
So, if you regularly hit hard on one part of the tip e.g. power screw shots, the tip is constantly trying to 'drag' the ferrule top in that one place as it compresses and spreads out. Particularly on smaller ferrules where there is not so much material, there is the potential for this to cause the material to 'break out' at that point.
2) If you fit a BlackSpin tip, or any other black or very dark tip, to a BlackSpin ferrule, it can be very difficult to see where the tip ends and the ferrule starts. But using a different colour tip pad helps to see when the tip needs changing, i.e. if the tip is almost down to the pad, it is time to change tips. This prevents the danger of playing on the ferrule material itself which is guaranteed to cause damage.
An added advantage is that the tip pad is much easier to remove cleanly from the top of the ferrule, so there is also much less chance of damaging or mis-shaping the ferrule as you clumsily try to tear the old tip off with that blunt blade you've been using...
So, whilst BlackSpin ferrules do indeed need extra care when re-tipping, the use of a tip pad will prevent any problems. Please read the instructions for fitting a tip pad to any tip further down the page.
Important
Do Not attempt to re-tip any BlackSpin ferrule before watching the video here
It will show you how to re-tip any cue, BlackSpin or plain brass, with no risk of damage to the ferrule. Even if you have re-tipped many cues, I advise you to watch it and take advantage of some very useful tips on how to do it properly. Clearly that is not the case with many of you judging by the terrible condition of the many brass ferrule cues that I get in for repair. Tut tut...
Trust me, watch the video and avoid any costly mistakes.
How To Install MW Tip Pad
1) Use cyanoacrylate glue (superglue) - Any superglue is fine but preferably use gel or thick type because it is easier to control.
2) There is no need to sand the pad but lightly dampen the pad first by wetting your fingertip and touching it on the pad. Then blow on it so it is not ‘wet’ to look at. Moisture helps to cure superglue and also ensures there is no dust/dirt on the pad to cause problems with adhesion.
3) Lightly sand the back of the tip to ensure it is dead flat and clean, then dampen the tip base using the same method used in step 2 above.
4) Put the tip pad on a flat surface with a spot of superglue in the middle of the pad.
5) Carefully position the tip centrally on top of the pad and press down with finger pressure for a few seconds. Use enough superglue so that a little comes out all round the sides of the tip to be sure the whole tip is stuck. Do not use too much glue so that it drips over the side of the pad or you may stick it the surface you are working on. Your wife/mother’s favourite table probably…
6) Once stuck, use scissors to trim around the tip. The top edge of the scissors should run against the wall of the tip so it’s easy to guide it round and trim the excess pad off in just a few seconds, leaving the tip pad almost exactly the same size as the tip.
7) Don't worry if you’re a little bit out here and there, you only need to be close enough so that you can clearly see you are positioning the tip correctly on the ferrule. But if you leave too much on, you may misjudge and stick the tip off to the side slightly, so try to trim it nice and close.
8) Lightly sand the the base of the now padded tip to ensure it is dead flat and clean.
9) If you wish to stick the tip to your ferrule using superglue, dampen the pad again using the same technique described in step 2 above. If you wish to use epoxy or contact adhesive, do not wet the tip.